Back to tutorials
FLATTENING
HOW TO FLATTEN EFFECTS & TRANSPARENCIES IN ILLUSTRATOR
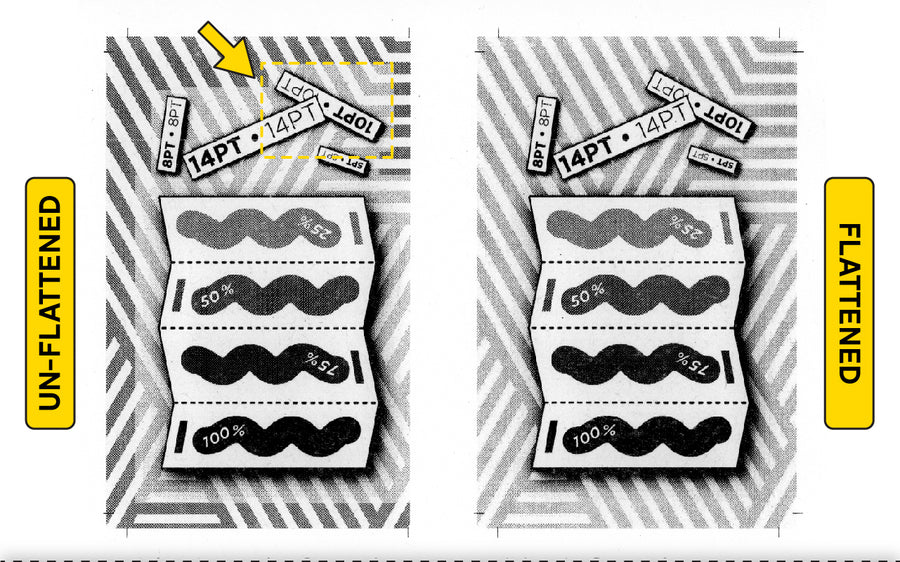
STEP 1: If your artwork contains effects such as drop shadows, the riso will pick this up and print boxes across your artwork.
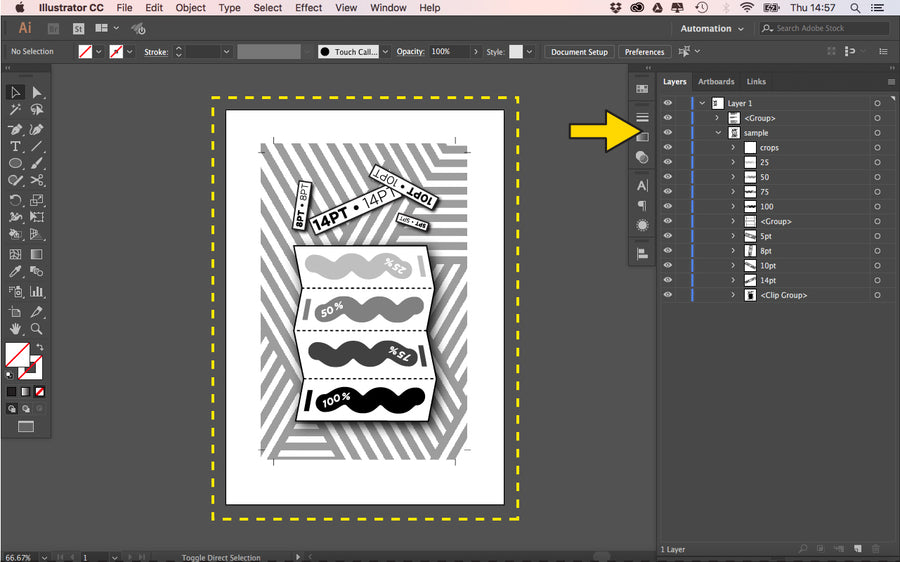
STEP 2: Open your file in Illutsrator and expand the layers. Group elements that are vectors and can remain un-touched.
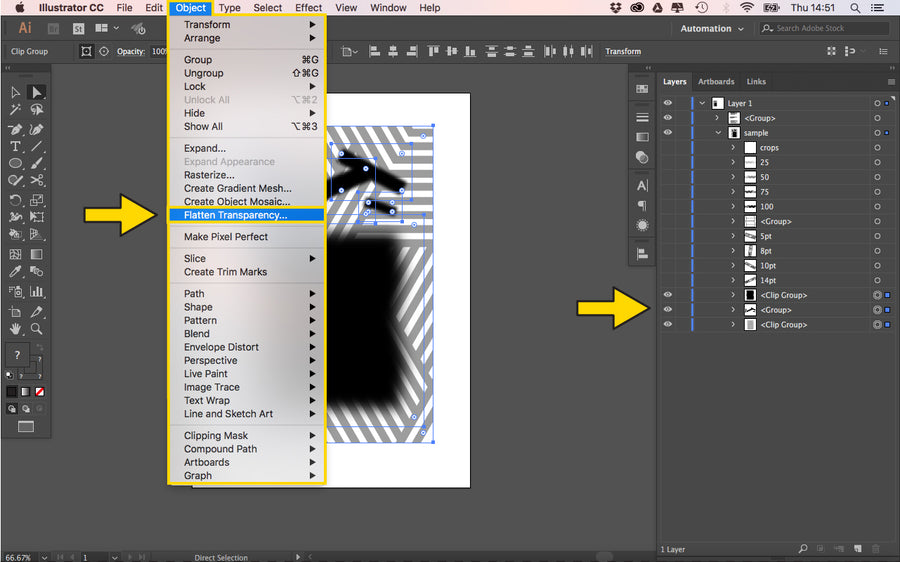
STEP 3: Turn off all layers that are to remain as vectors, and isolate the effected elements to be rasterised and flattened.
STEP 4: Turn off all layers that are to remain as vectors, and isolate the effected elements to be rasterised and flattened.
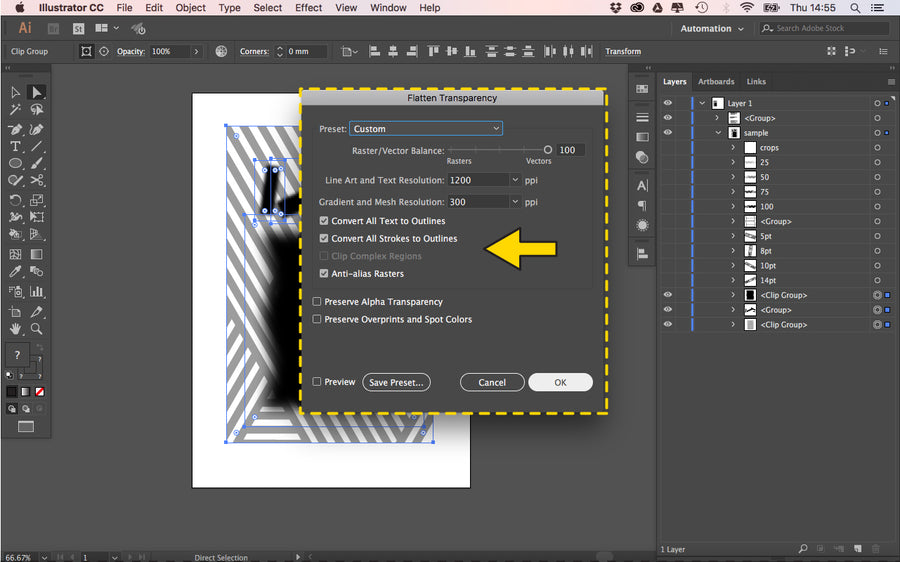
STEP 5: Set the Preset to ‘Custom’ and set the options to match the setting. We want the quality to be the highest. Click ‘OK’ once you're done.
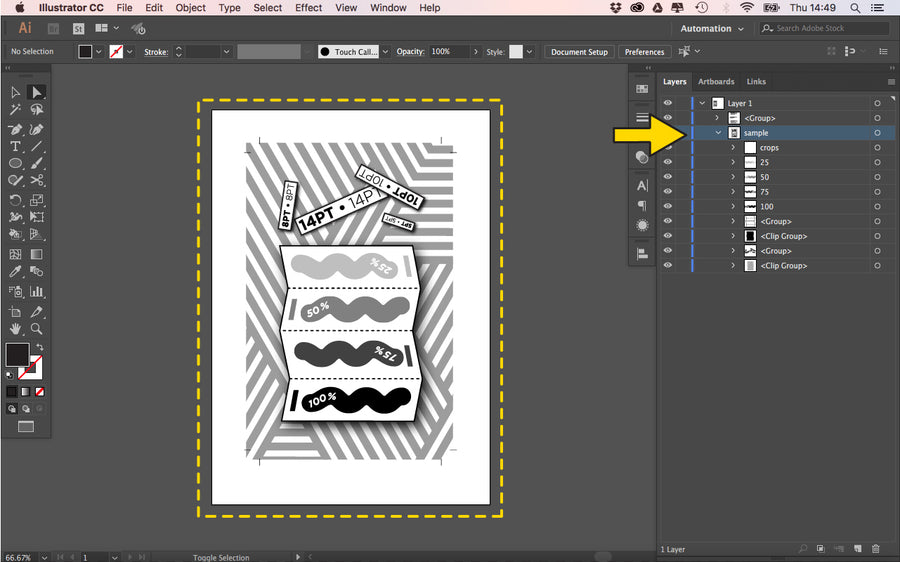
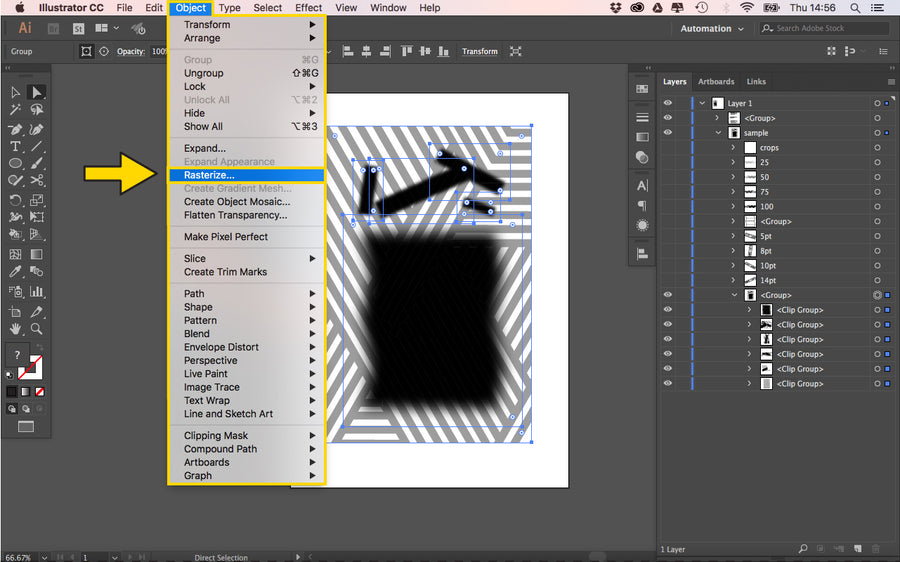
STEP 6: Now that you have created a clip group of the effected elements, go to ‘Object’ and ‘Rasterise...’
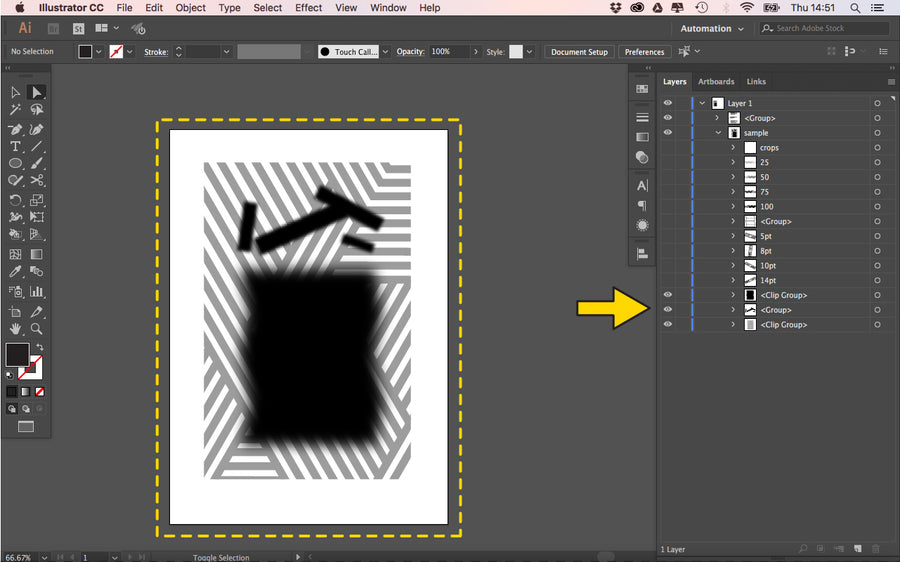
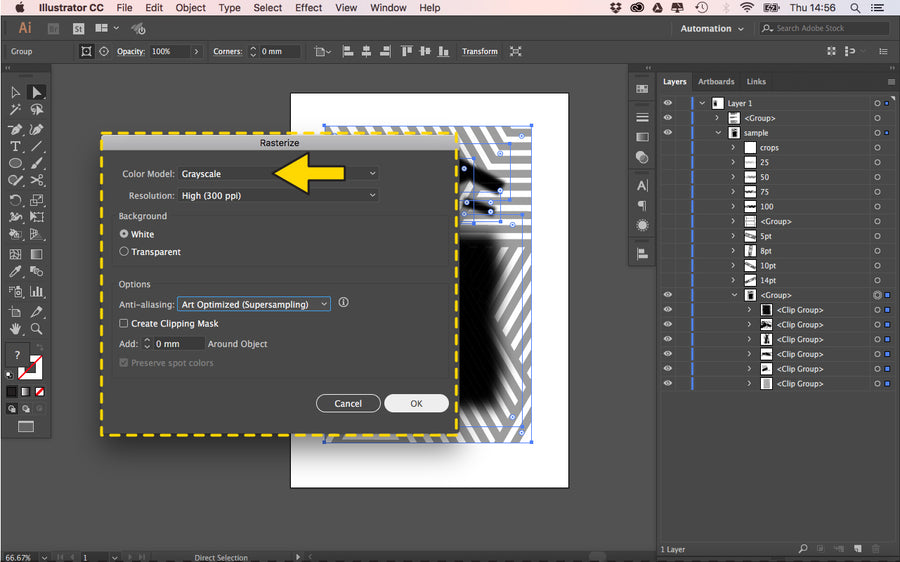
STEP 7: Set the Color Model to ‘Greyscale’ and the Resolution to ‘High (300 ppi) Background should be ’White’. Click ‘OK’ to rasterise artwork.
STEP 8: You can now turn back on all your other elements. Your arwork is now ready to save for print!