Back to tutorials
Grab the Adobe .ase file related to this tutorial:
SWATCHES:
INSTALLING AND USING OUR RISOTTO SWATCHES
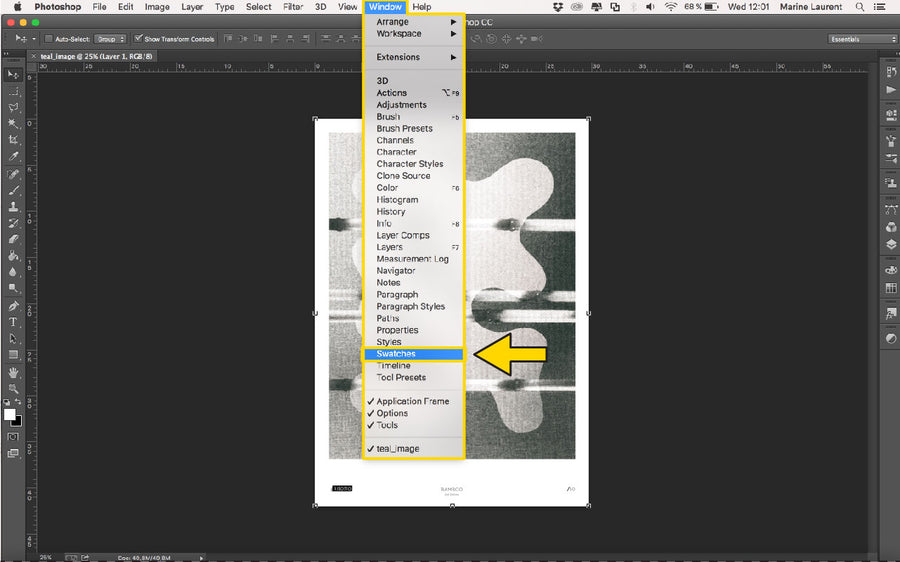
STEP 1: Open your artwork in Photoshop, and got to ‘Window’ to enable the 'Swatches’ menu.
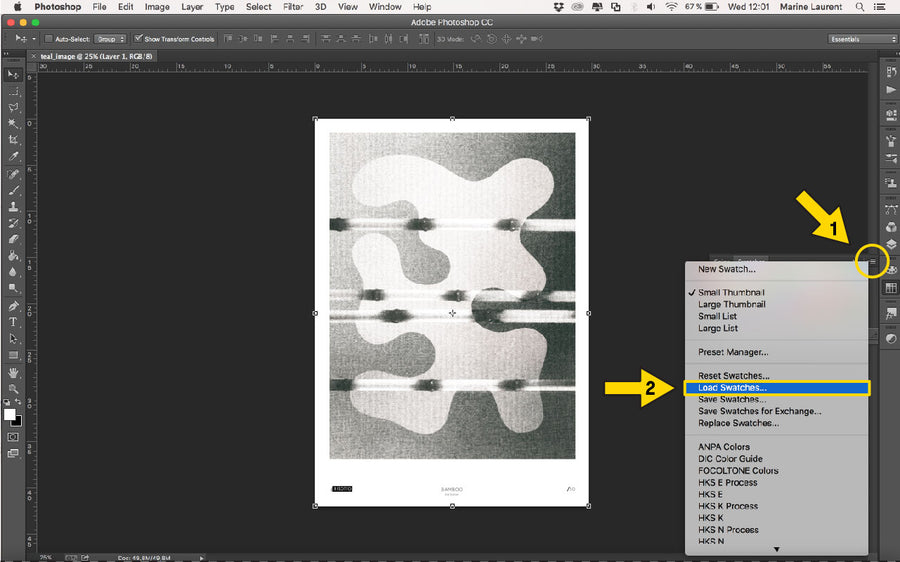
STEP 2: Click on the top right ‘Menu' symbol of the ’Swatches’ tab. A drop down will appear. Click ‘Load Swatches...’
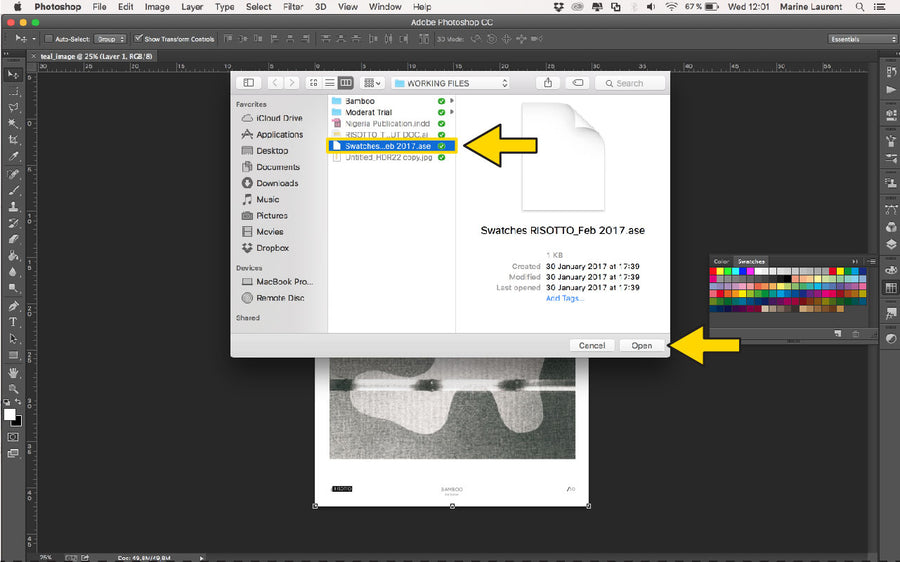
STEP 3: A finder menu will appear. Locate your latest dowload of our ‘Swatches RISOTTO.ase' file, (It might be in your downloads) and ’Open’
STEP 4: Our inks are now available in your 'Swathes' tab. N.B These tones will vary from screen to screen. Order our samples to see printed inks in the flesh!
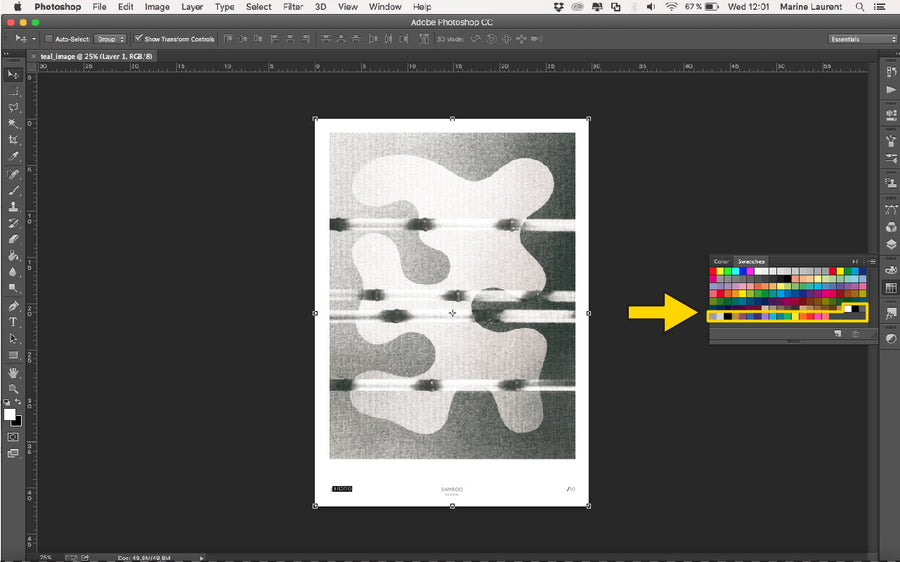
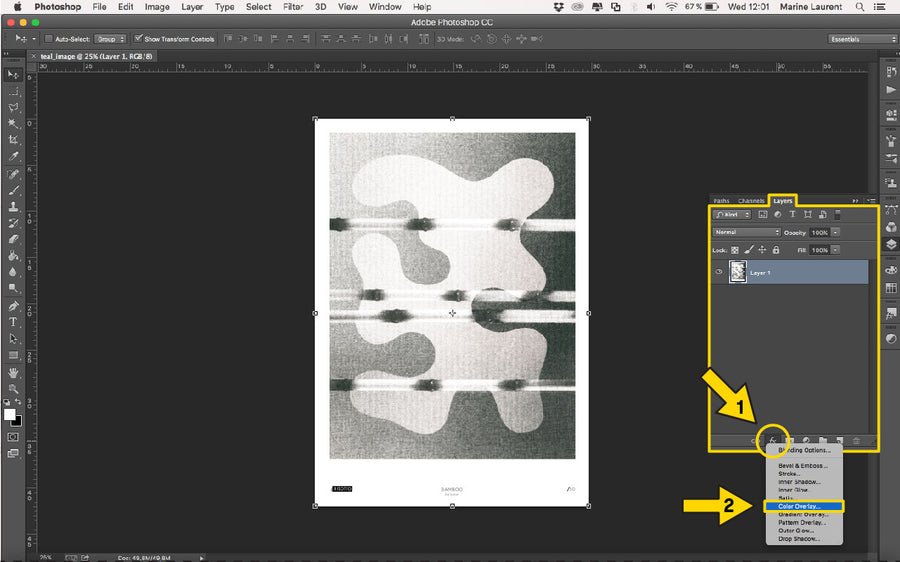
STEP 5: You can now using our inks. Click on the ‘fx’ symbol at the bottom of the ‘Layers’ tab. A drop down will appear. Click on ‘Color Overlay...’.
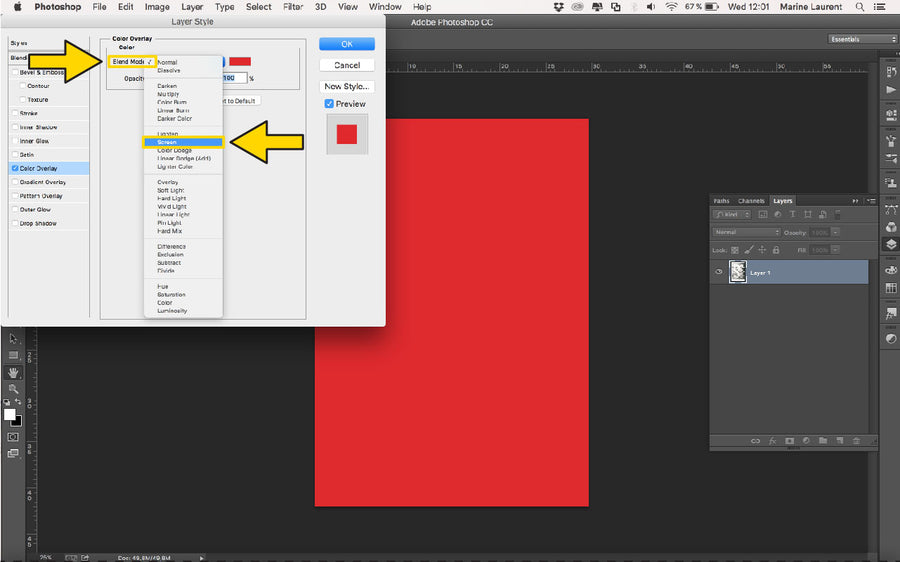
STEP 6: A new window will open. In the 'Color Overlay' tab, change the ‘Blend Mode’ . Click on the drop down, and select ‘Screen’.
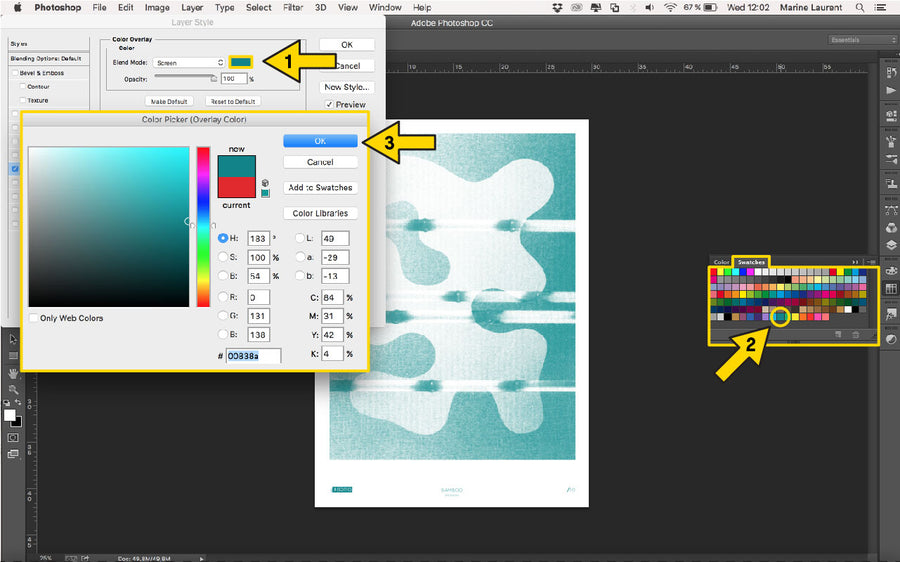
STEP 7: To change this colour, double click on the rectangle. A new window will appear. Select the ink you want in the 'Swatches' tab. Then 'OK'
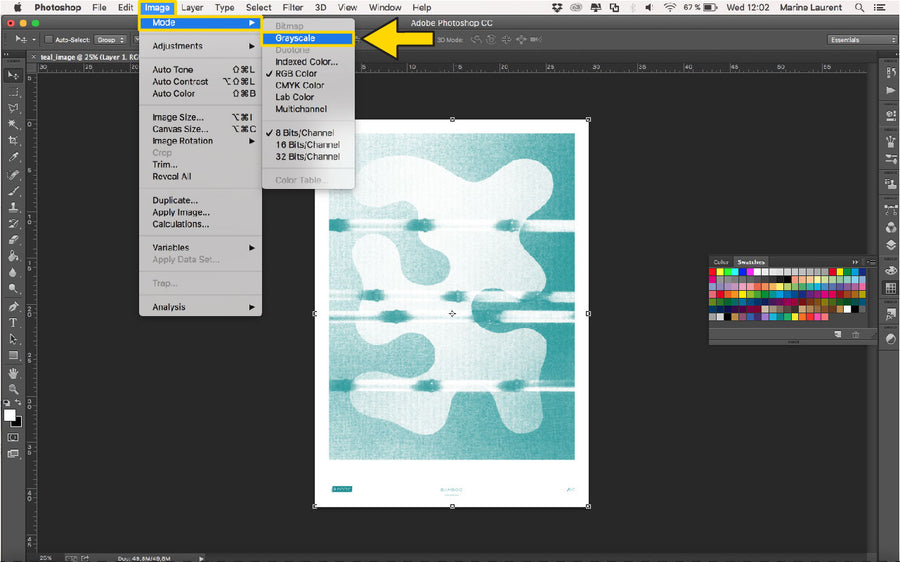
STEP 8: Remember - Set your artwork to 'Greyscale' before saving the print. Go to ‘Image’ then ‘Mode’ and chose ‘Greyscale’