Back to tutorials
BUSINESS CARDS
ARTWORK LAYOUT AND SAVING FILES FOR BUSINESS CARDS
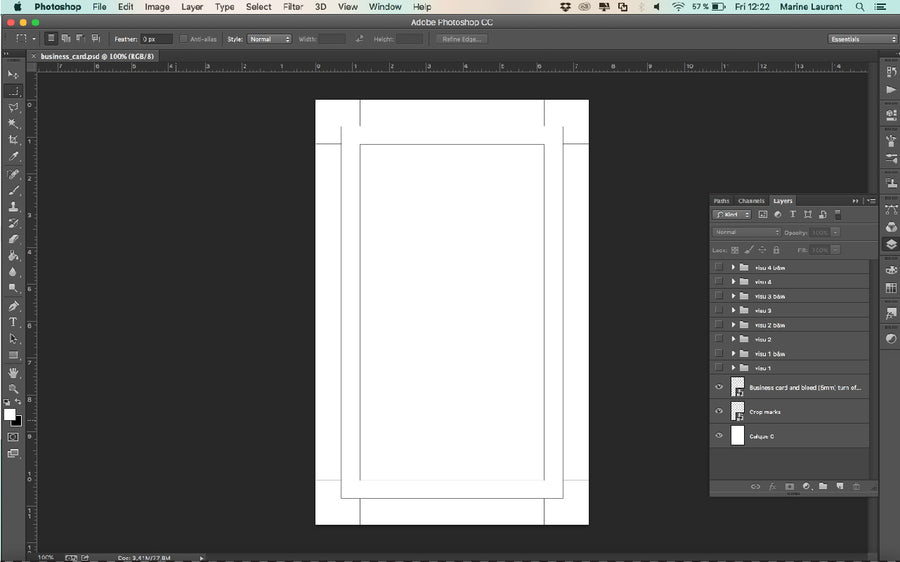
STEP 1: Download our 'Business Card Template' to see the printable are and bleed guides.
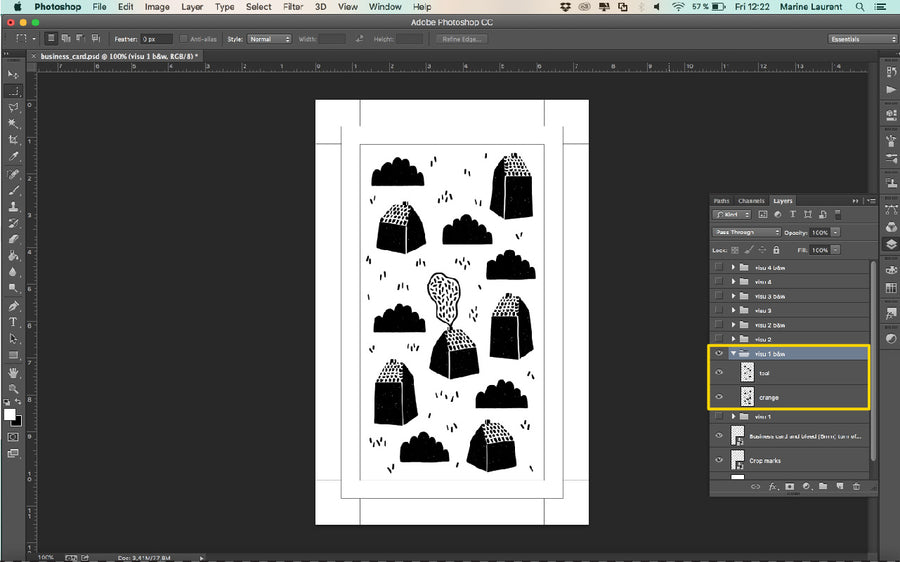
STEP 2: Create your design and separate your artwork by colour layers.

STEP 3: Set your layers to greyscale.
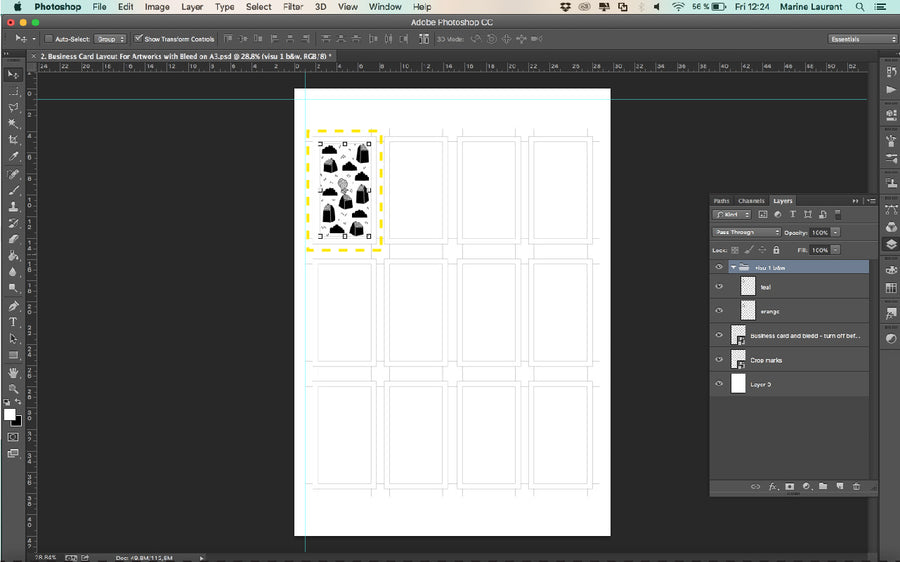
STEP 4: The next step is to lay all the cards out on an A3. Download our 'Business Card Layout A3 Template' to position artwork correctly within the guides.
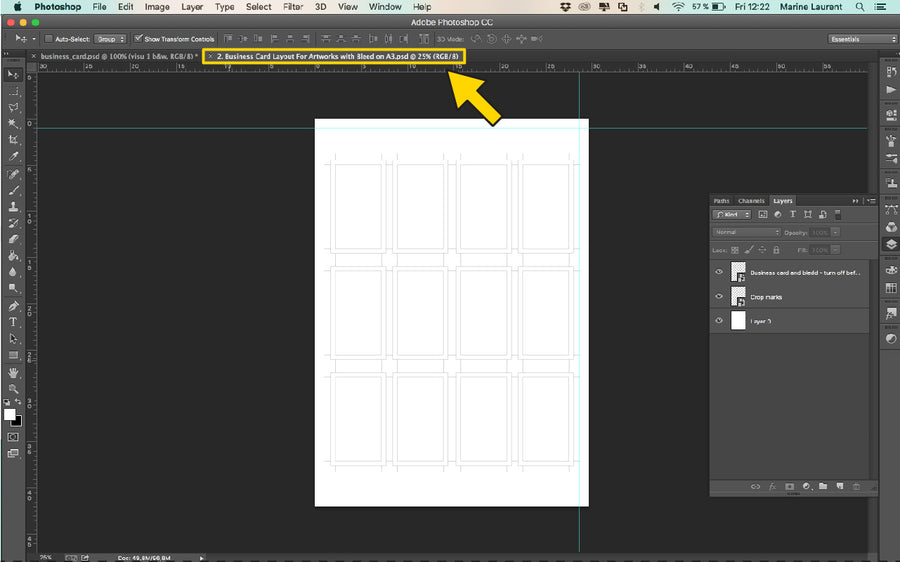
STEP 5: Drag and drop your business card artwork onto the template.
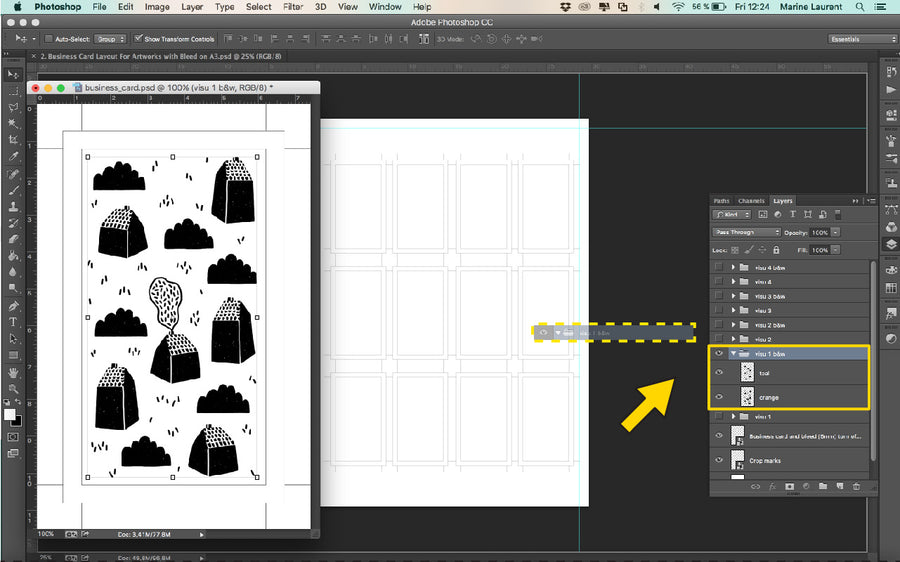
STEP 6: Adjust your artwork to fit, and make sure each layer is aligned.
STEP 7: Duplicate your design to have one in each area.
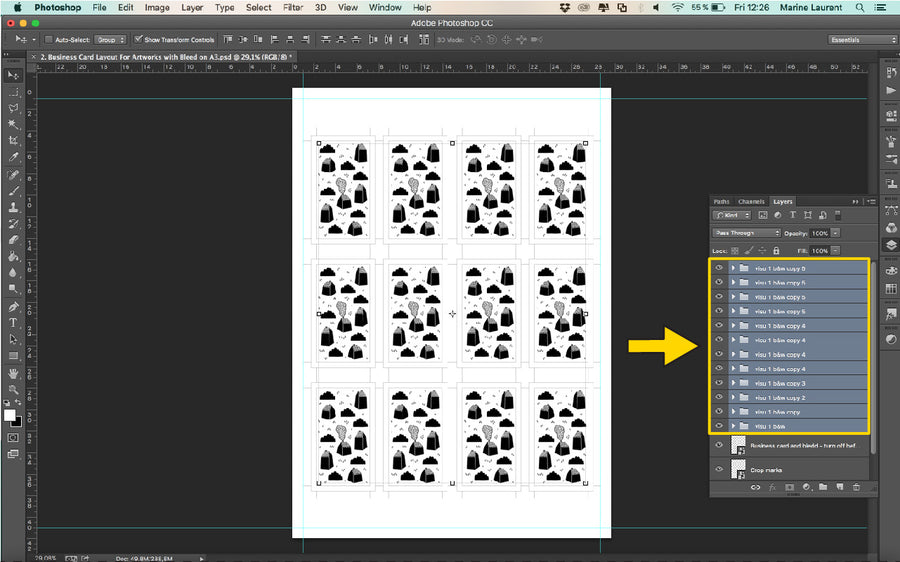
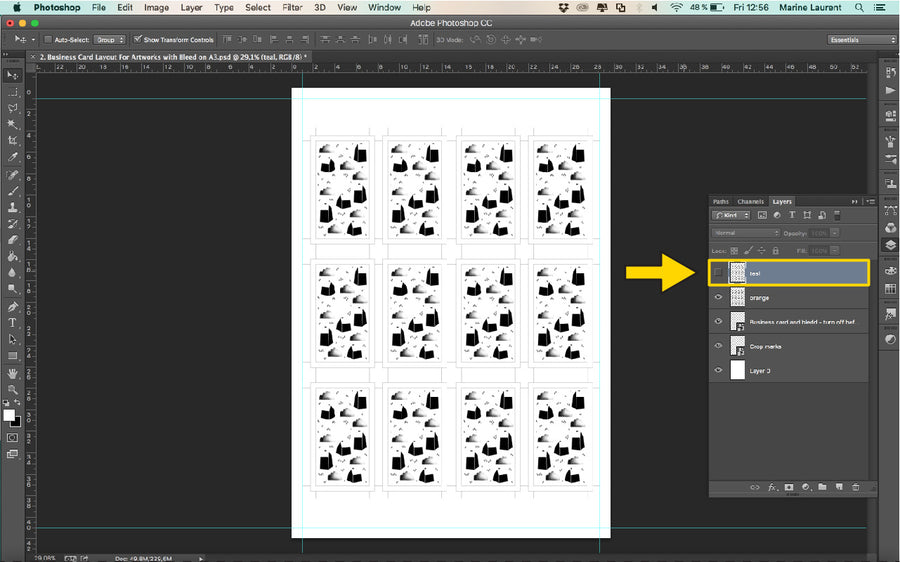
STEP 8: Finally, merge all your Teal layers into one layer. Do the same for every other colour.
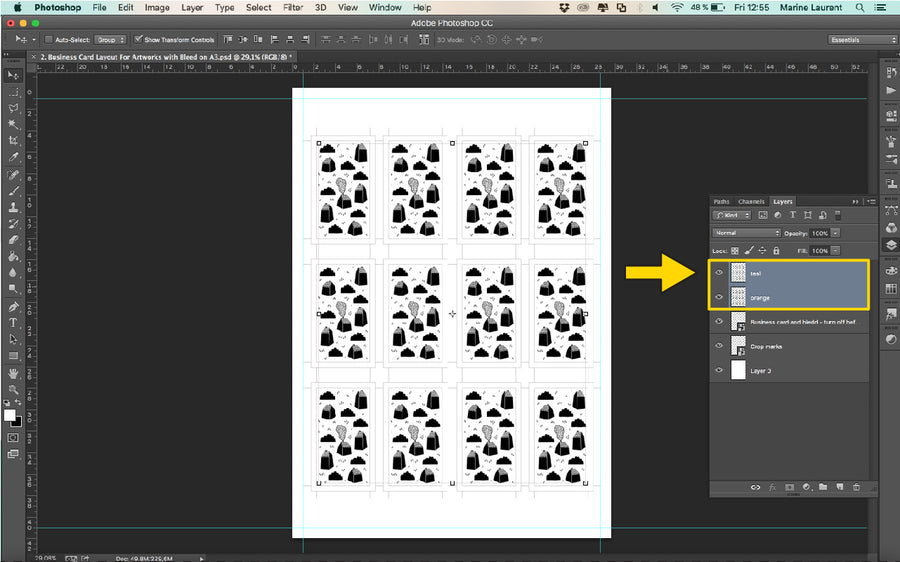
STEP 9: We'll start to save the Orange layer. Begin by hiding the Teal by turning off the layer.
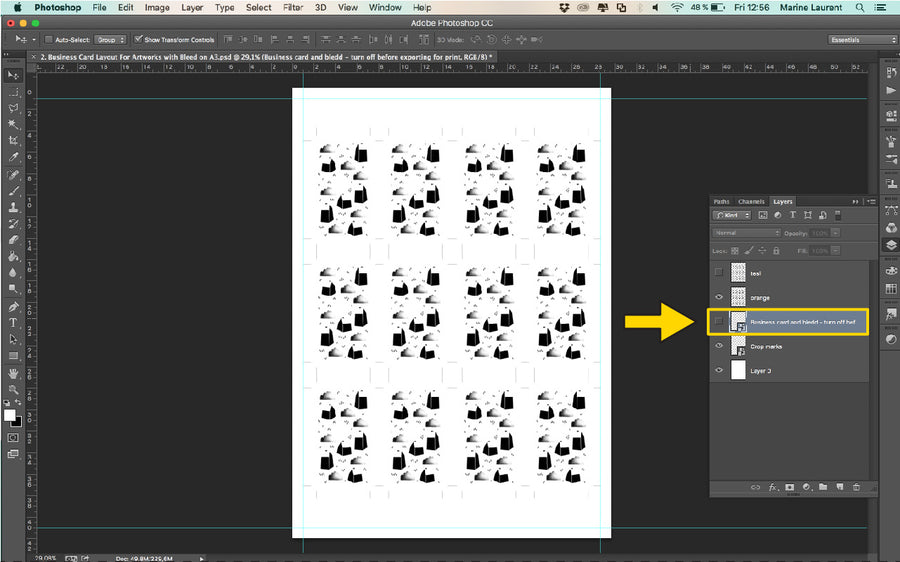
STEP 10: Before save your file, turn off the 'Business card and bleed'. But remember to keep on the 'Crop Marks' layer.
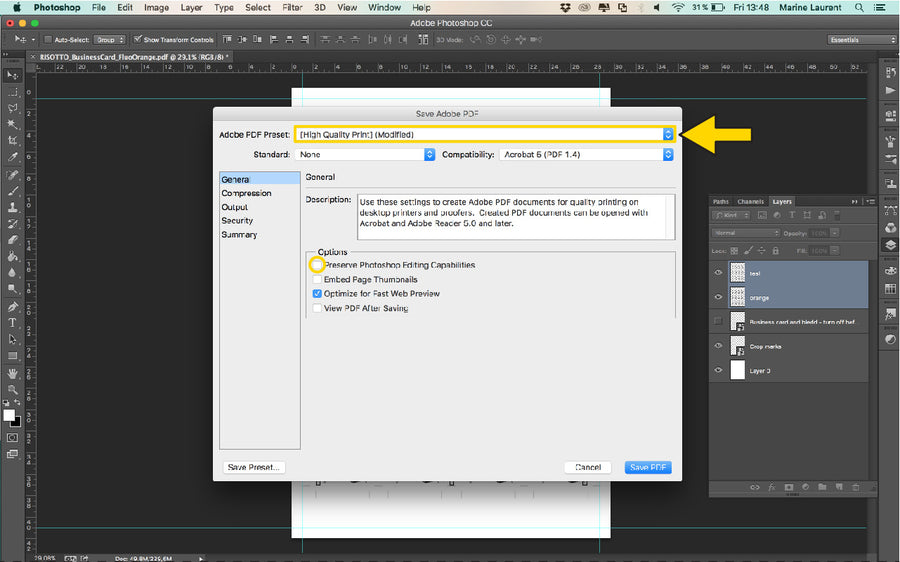
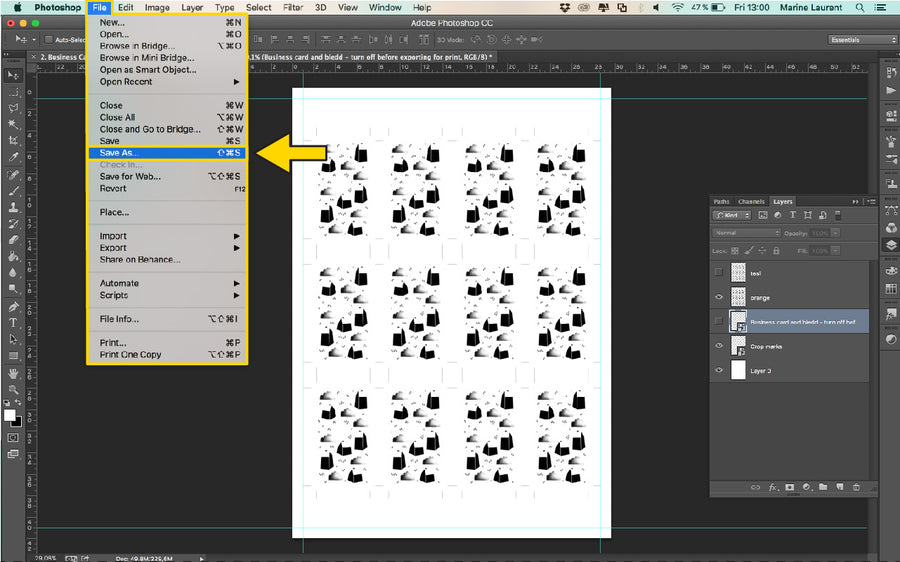
STEP 11: Now we are ready to save this file. Go to 'File' and 'Save As...'.
STEP 12: Name your file appropriately with Your name/Project title + the ink colour assigned to the artwork. The format should be PDF, and untick all the boxes.
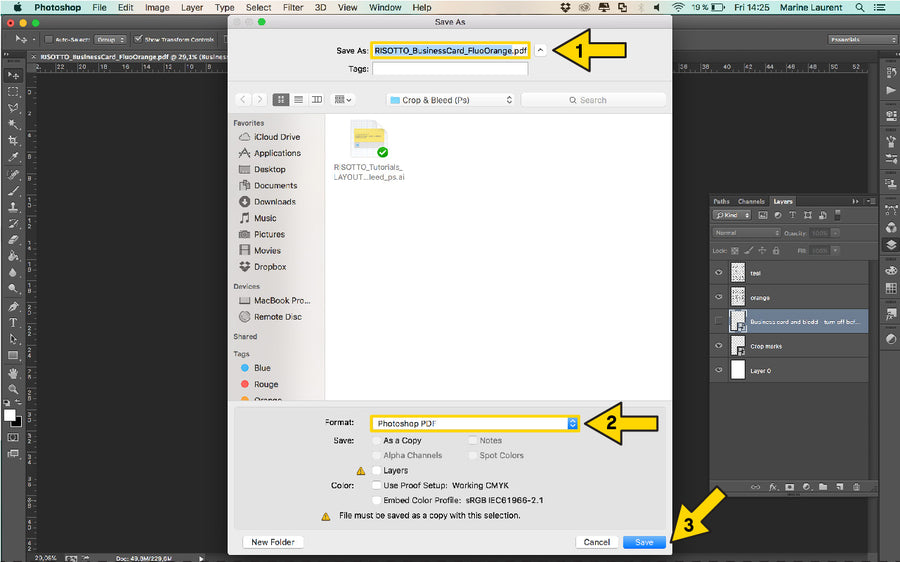
STEP 13: Select the Preset ‘High Qualiity Print’ and untick ‘Preserve Photoshop Editing Capabilities’. Hit ‘Save’, and you should be left with file under 10MB.