Back to tutorials
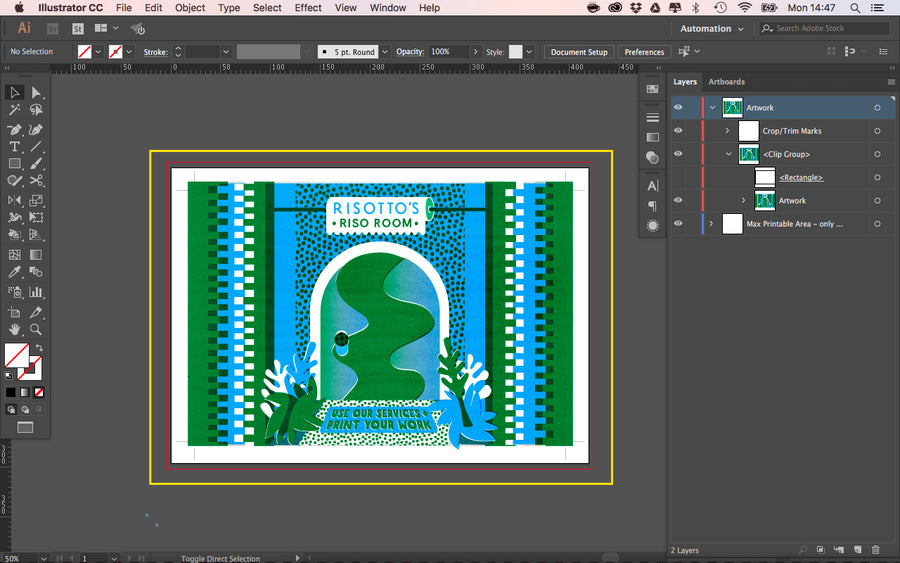
CROP MARKS
ADDING CROP MARKS TO ARTWORK IN ILLUSTRATOR
STEP 1: Open your file in Illustrator, with artboard sized to artwork dimentions. Ensure bleed is included if artwork runs to any edge.
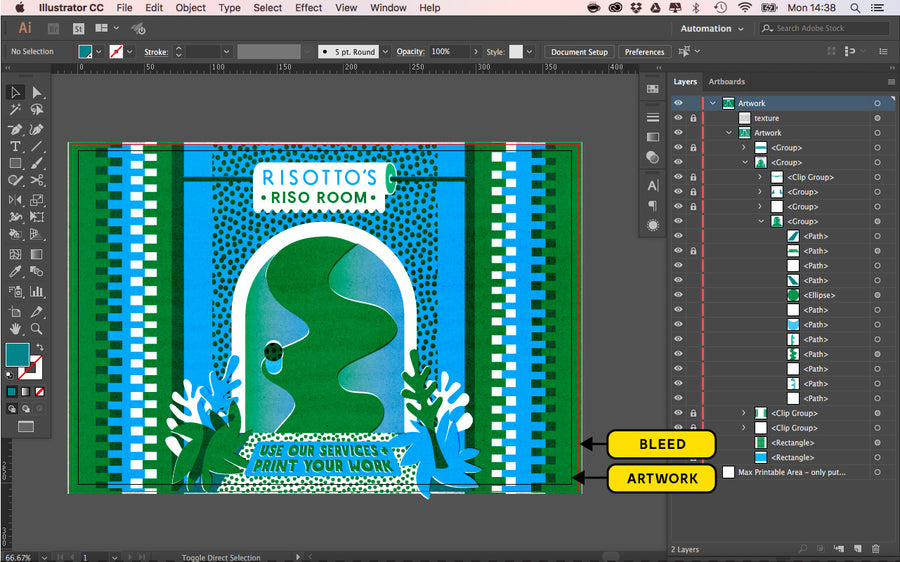
STEP 2: Group your artwork, and create a box that is the same size as the finished artwork (not the outer bleed edge), using the ‘Rectangle Tool’.
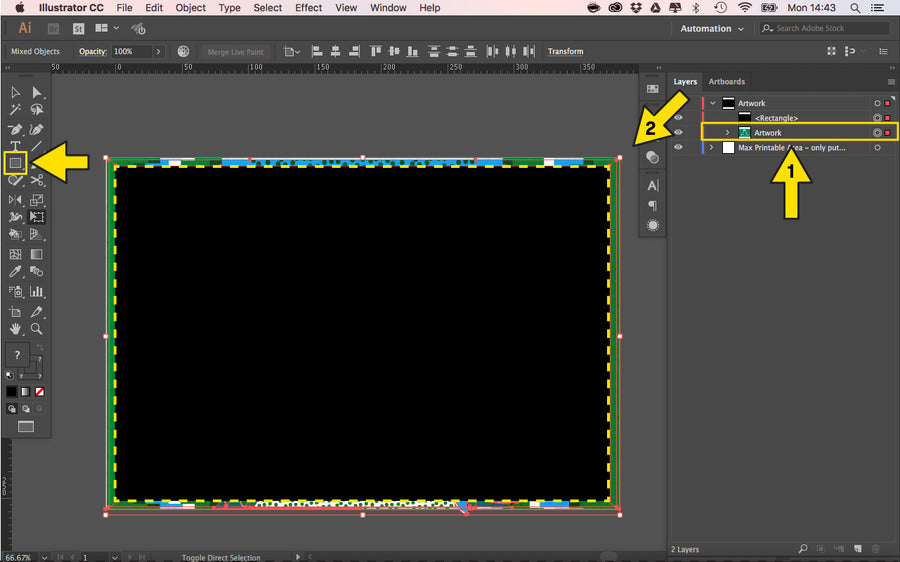
STEP 3: Select only the rectangle, and go to the ‘Object’ menu, and ‘Create Trim Marks’.
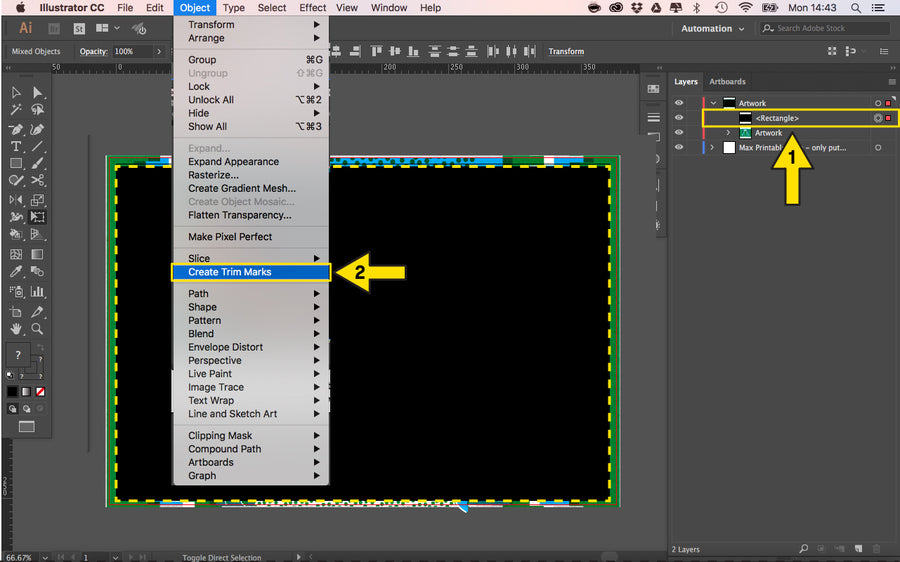
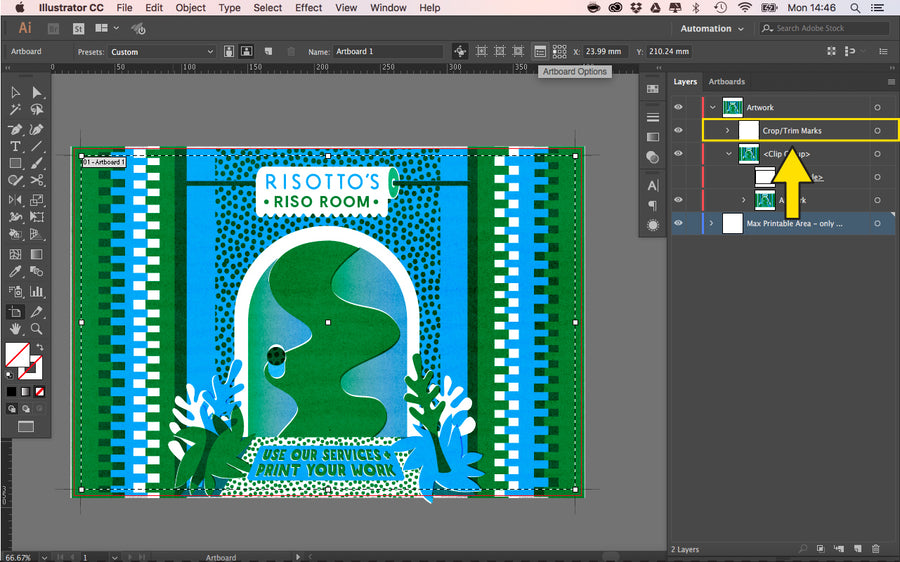
STEP 4: Your Crop marks will now be in place, and you’re almost finshed setting things up. We just need to place this on an A3 Artboard...
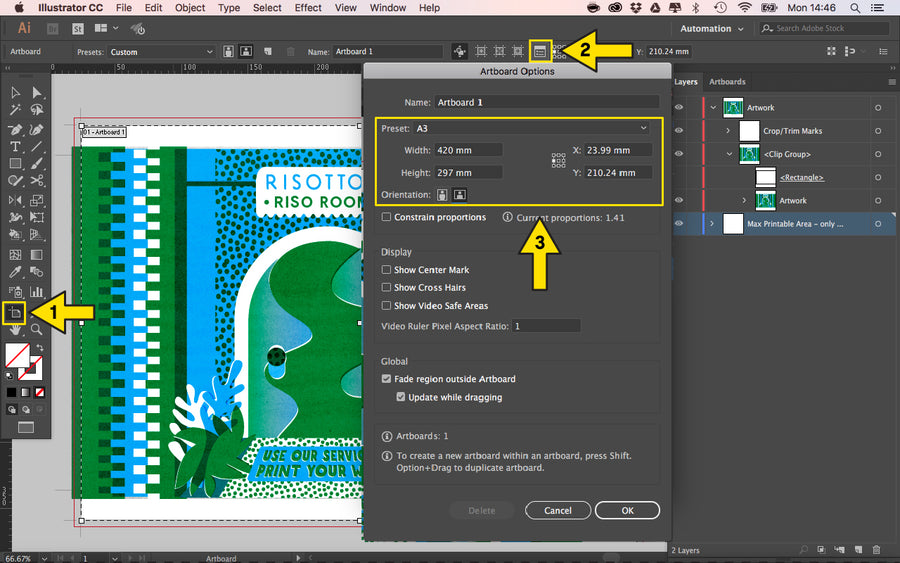
STEP 5: Select the ‘Artboard Tool’ on the left, and then select the ‘Artboard Options’ botton along the top. Select the ‘A3’ preset, or enter A3 dimensions + ‘OK’.
STEP 6: Move your artwork so that it is centered on the A3 artboard, and Voilà! Your artwork has crop and bleed and just needs separated.